This guide explains how to assign, or “allocate,” a created job to suitable resources. Allocation is typically performed;
After creating a job using the schedule job screen;
- Creating Single Booking using the Schedule Job Screen (HCP)
- Creating Single Booking using the Schedule Job Screen (AC&D)
Or inside our healthcare consoles when editing a job.
Accessing the Job Allocation Screen
You can access the resource allocation interface in a few ways:
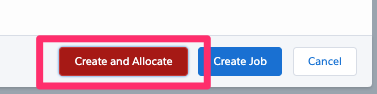
Immediately After Job Creation: When you finish creating a job using the “Schedule Job Screen”, you may see options like:
- Create and Allocate: This opens the allocation screen directly.
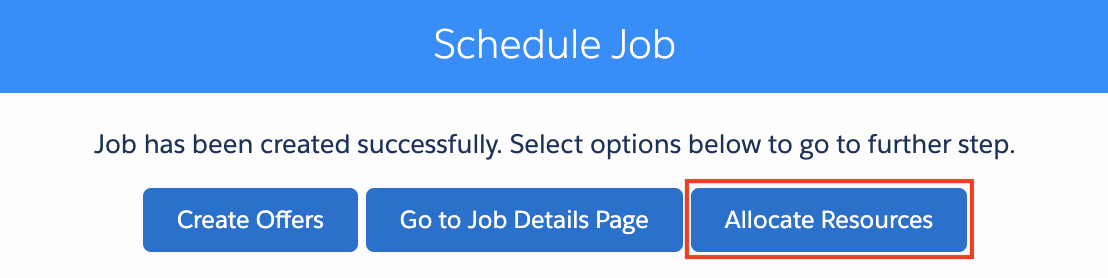
- Allocate Resources: Click this button on the job creation confirmation screen.
From an Existing Job: Navigate to the specific Job record inside our consoles and click the edit button.
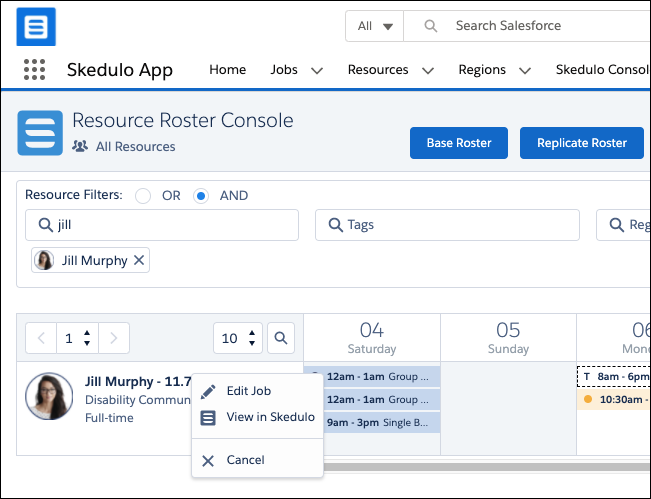
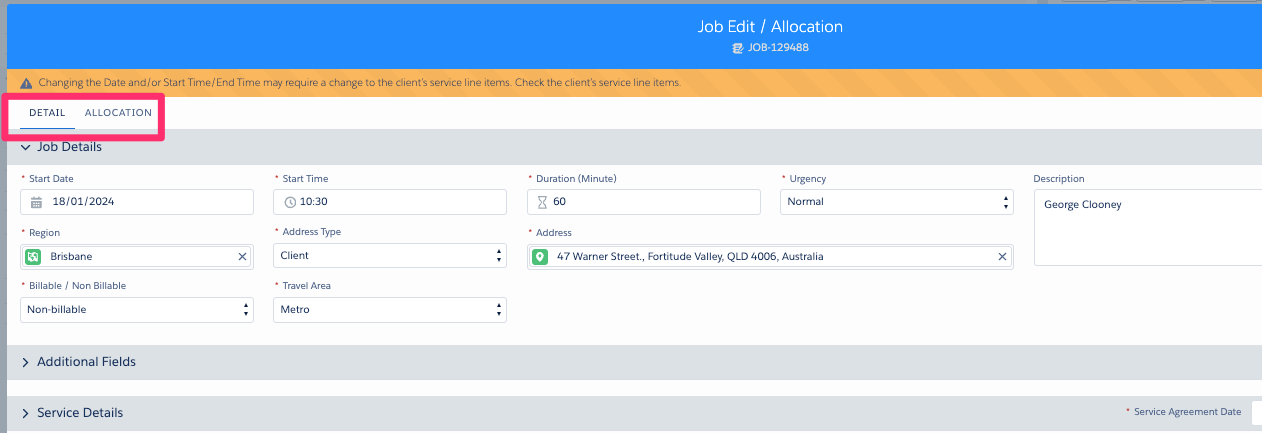
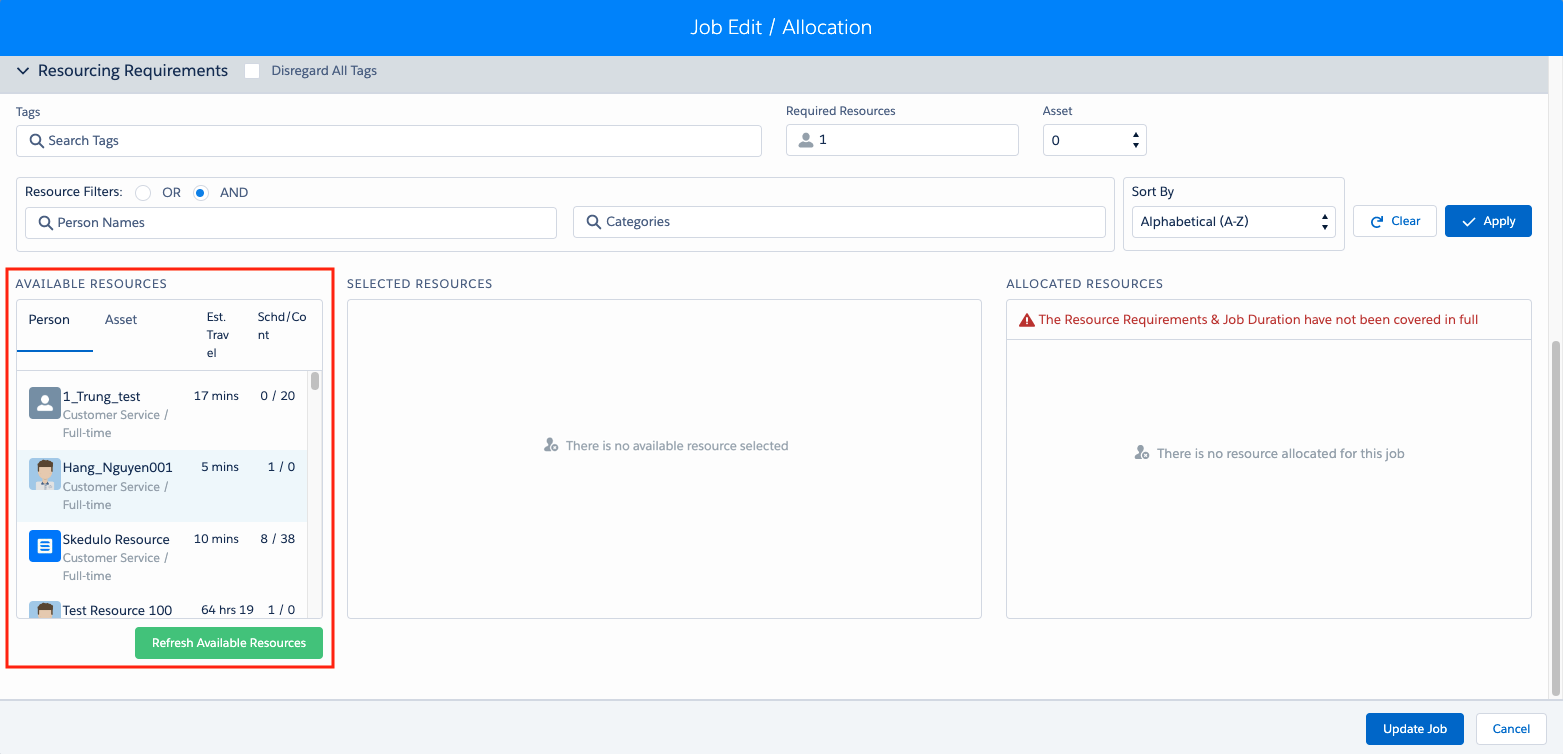
The allocation interface usually appears as a modal window titled “Job Edit / Allocation”. It might be embedded within the main scheduling screen or appear as a separate pop-up window.
Note: The appearance and specific features of this screen might be customized for your organization, potentially to support different Award Interpreters or specific business requirements.)
Understanding the Allocation Screen Layout
The allocation screen is typically divided into three key sections:
- Suggested Resources: Lists resources who can perform the job based on criteria like availability, tags, and region.
- Selected Resources: A temporary holding area for resources you are considering for the job (chosen from either the Available or Unavailable lists).
- Allocated Resources: Shows the resources officially assigned to the job.
Configuration Note: The layout might optionally display Job Details and Resource Allocation in separate tabs, controlled by a system setting found in Skedulo Configs
Finding the Right Resources: Available & Unavailable Lists
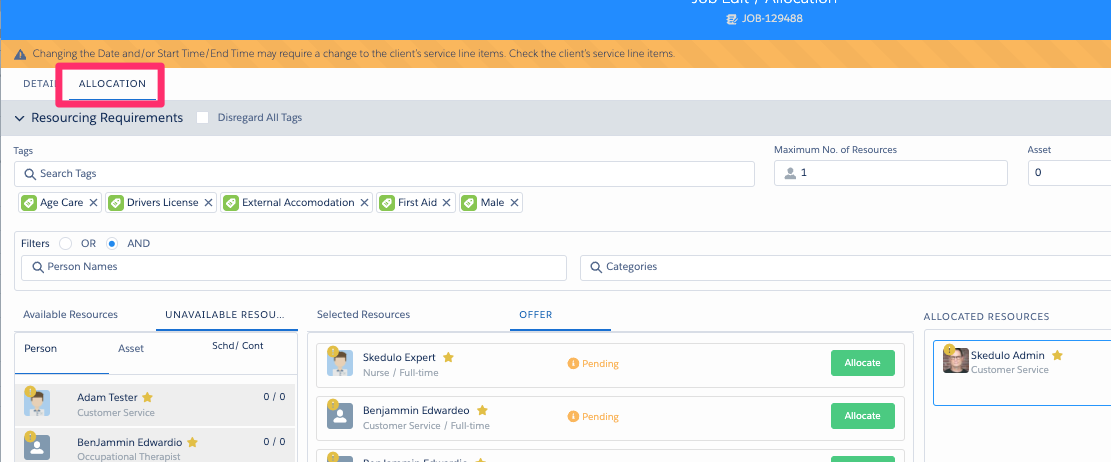
The Job Edit / Allocation modal displays with the Resourcing Requirements and resource filter sections, showing available resources who have matching tags to the job. All suggested resources are shown the first column.
For some environments, the available resources section is broken into tabs.
1. Available Resources Tab/Section:
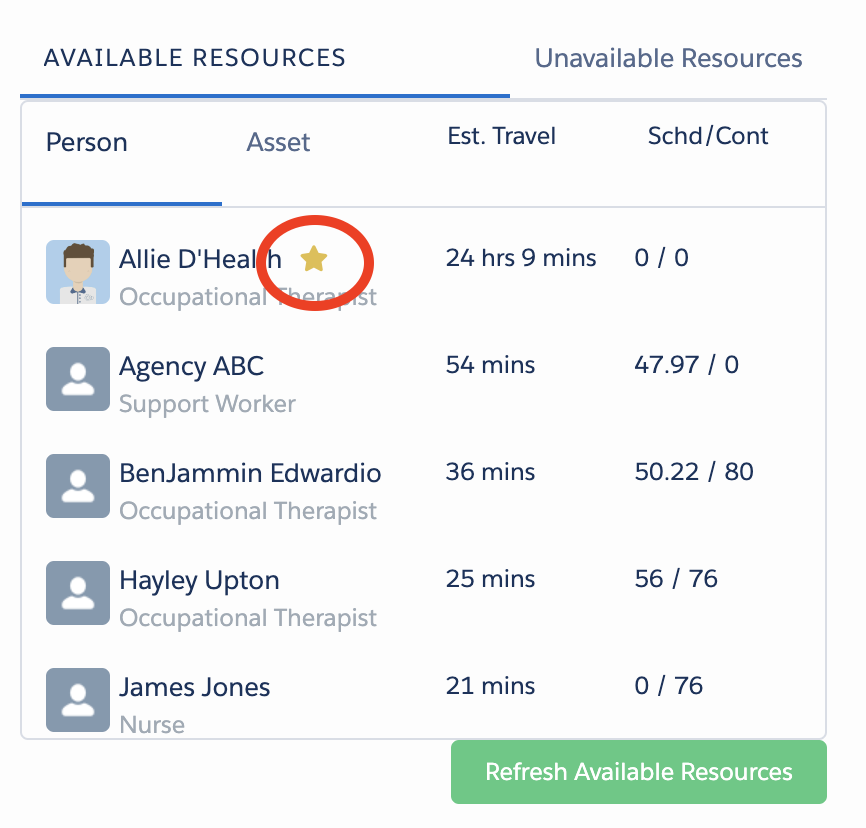
- Shows all resources meeting the job’s requirements.
- Included Resources: Resources specifically included for the client’s Account or the Job’s Location are highlighted with icons:
- ⭐ (Yellow Star): Account Included Resource
- 📍 (Yellow Pin): Location Included Resource
- Use the filtering and sorting tools to narrow down the list.
- Click on a resource to move them to the “Selected Resources” section.
2. Unavailable Resources Tab/Section:
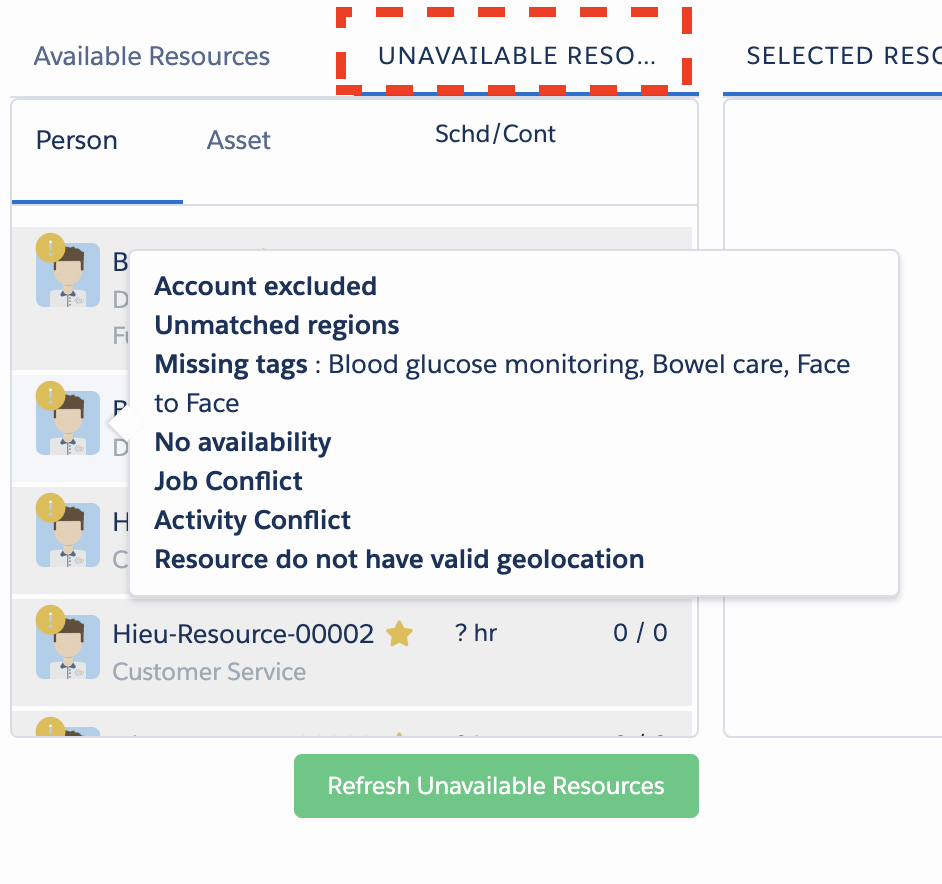
- Shows resources who cannot be assigned and why.
- Included Resources: Account (⭐) and Location (📍) included resources are still indicated here.
- Reasons for Unavailability: A resource might be unavailable due to:
- Account excluded
- Location excluded
- Unmatched region
- Missing required tags
- No availability during the job time
- Job conflict (already assigned to another job)
- Activity conflict (e.g., leave, training)
- Infeasible travel time
- Resource does not have a valid geolocation
- You can still select an unavailable resource to move them to the “Selected Resources” section if you need to investigate further or override constraints manually (if permitted).
Configuration Note: This tab might be hidden based on a system setting (e.g.,Show_Unavailable_Resource,Skedulo Configs: Show_Unavailable_Resource,HC_Console_Settings: Show_Unavailable_Resource). A performance setting (Skedulo Configs: Load_All_Info_Unavailable_Resources) may control whether all unavailability reasons load instantly or only when hovering over a resource.)
Filtering and Sorting Resources
To efficiently find resources in both the Available and Unavailable lists, use the resource filter tools at the top of the resourcing requirements section:
- Filters:
- Tags: Filter by specific skill or qualification tags relevant to the job.
- Personal Names: Search for a specific resource by name.
- Categories: Filter by resource categories (if configured).
- Sort By: Arrange the resource list based on:
- Account included: Prioritizes resources linked to the client account.
- Alphabetical (A-Z / Z-A): Sorts by resource name.
- Least/Most utilised: Sorts by resource workload.
- Location included: Prioritizes resources linked to the job location.
- Least/Longest Travel Duration: Sorts by estimated travel time to the job.
Selecting and Reviewing Resources
- Selecting: Click on any resource name in the Available or Unavailable lists to add them to the Selected Resources section.
- Reviewing: In the “Selected Resources” section, you can:
- Review the list of potential candidates.
- Modify the proposed start and end times for a resource (these times must fall within the overall job duration). The times you set here will be reflected in the resource’s agenda if they are allocated, overriding the default job times for that specific assignment.

Note: Allocation start and end times is controlled via a custom setting and may not be visible in your environment.
Offering the Job (Optional Feature)
If enabled, an Offers tab or section may be visible in “Selected Resources” section.
- Purpose: Allows you to send job offers to multiple selected resources simultaneously and track their responses (Accept/Decline).
- How: Select resources in the “Selected Resources” list and click the Offer button.
- Manage responses within the Offers tab. Accepted offers can then be formally allocated.
To learn more about offers please see the following guides;
Allocating Resources to the Job
Once the allocate button is clicked in the ‘Selected Resources’ section, the resources are moved into the ‘Allocated Resources’ section.
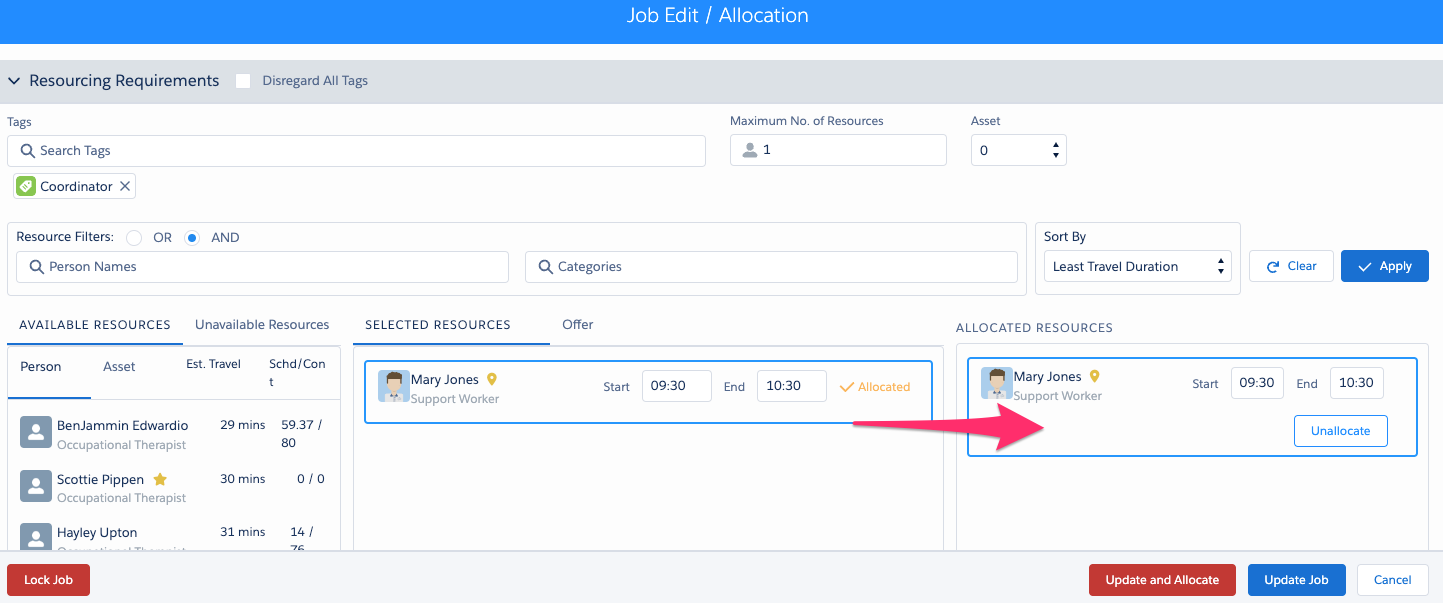
- How: Choose the desired resource(s) from the Selected Resources list. Click the Allocate button.
- Result: The resource(s) move to the Allocated Resources section.
- Effect: Once allocated, the job (with the specific start/end times you set during selection/allocation) will appear on the resource’s agenda/schedule.
Finalizing the Allocation
- Review: Check the Allocated Resources section to ensure the correct resources are assigned.
- Confirm: Click the Update Job button.
- Confirmation: A confirmation message (e.g., “Job Edit / Allocation”) will appear. You might have an option like Remain on Console to return to the screen where you initiated the process (e.g., the Account or Contact record).
The job is now successfully allocated, and the assigned resources’ schedules are updated.
Note: When scheduling a new job, associated Job Tasks from the job's template are typically included automatically.
Additional: Tab View
In some environments the allocate screen might be broken down into seperate tabs. Allowing you to switch between the details in the schedule job screen and allocation section in the schedule job screen.