Single booking are created using the schedule job screen. The scheduled job screen is the core interface/ model that is used to create all jobs and allocate jobs to resources.
Single client bookings are made using the Schedule Job modal. A single client job can be started from different views in Skedulo, including:
- Contacts tab, open the client’s contact record, and click Schedule Job.
- Client Availability Console (All Clients and Individual Client views), click on a date, then click the (+) plus sign and Add Job.
- Resource Roster Console (and Individual Resource view), click on date for resource worker, then (+) plus sign and then Add Single Client Job.
- Resource Calendar (and Individual Resource view), click on date for resource worker, then (+) plus sign and then Add Single Client Job.
- Roster Management, click on date for resource, (+) plus sign and Create Job.
- Scheduling Console (and Individual Resource view), click on date for resource worker, then (+) plus sign and then Add Single Client Job.
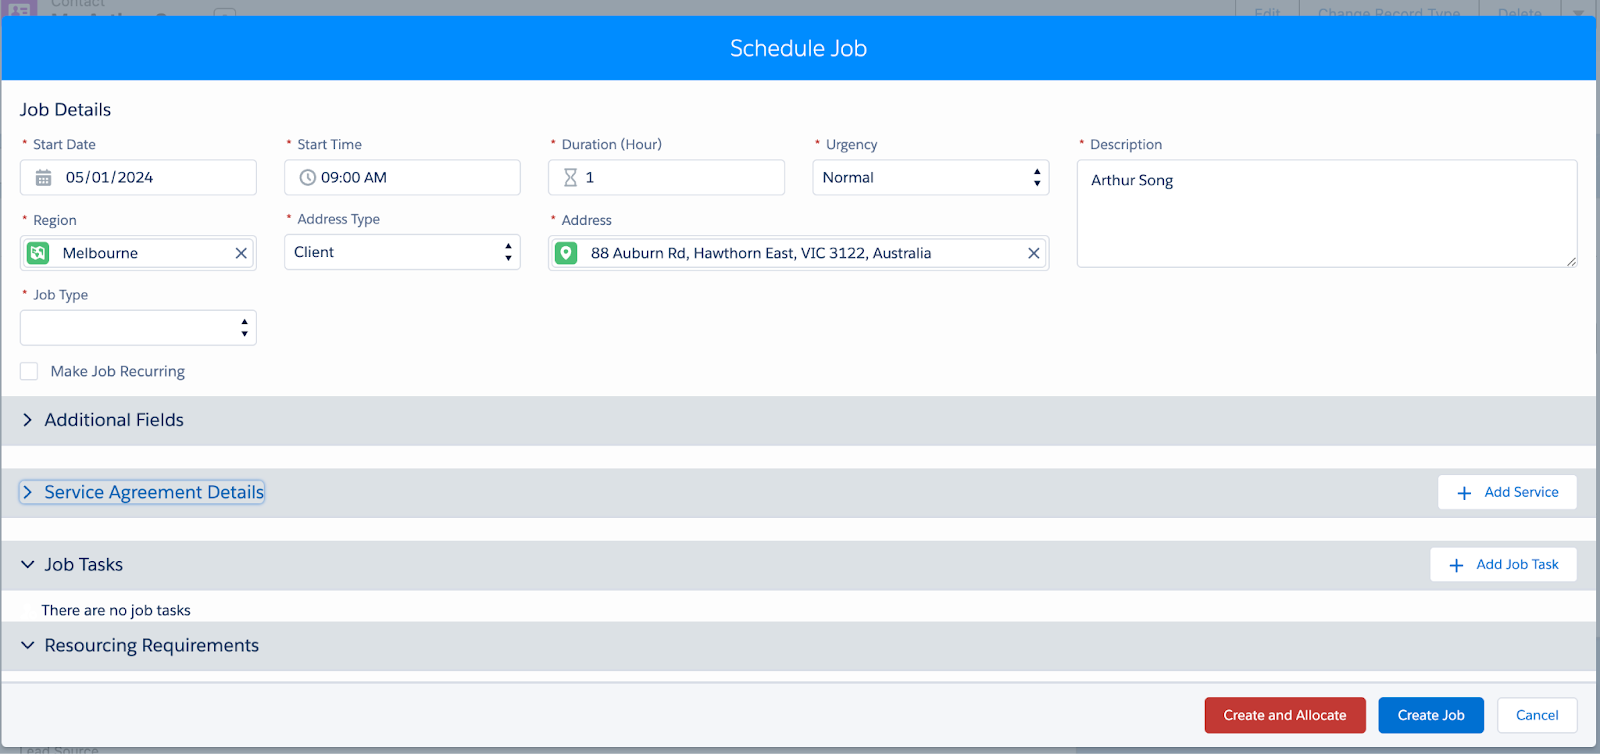
Components of the schedule job screen
The schedule job screen is made of the following components;
The job details
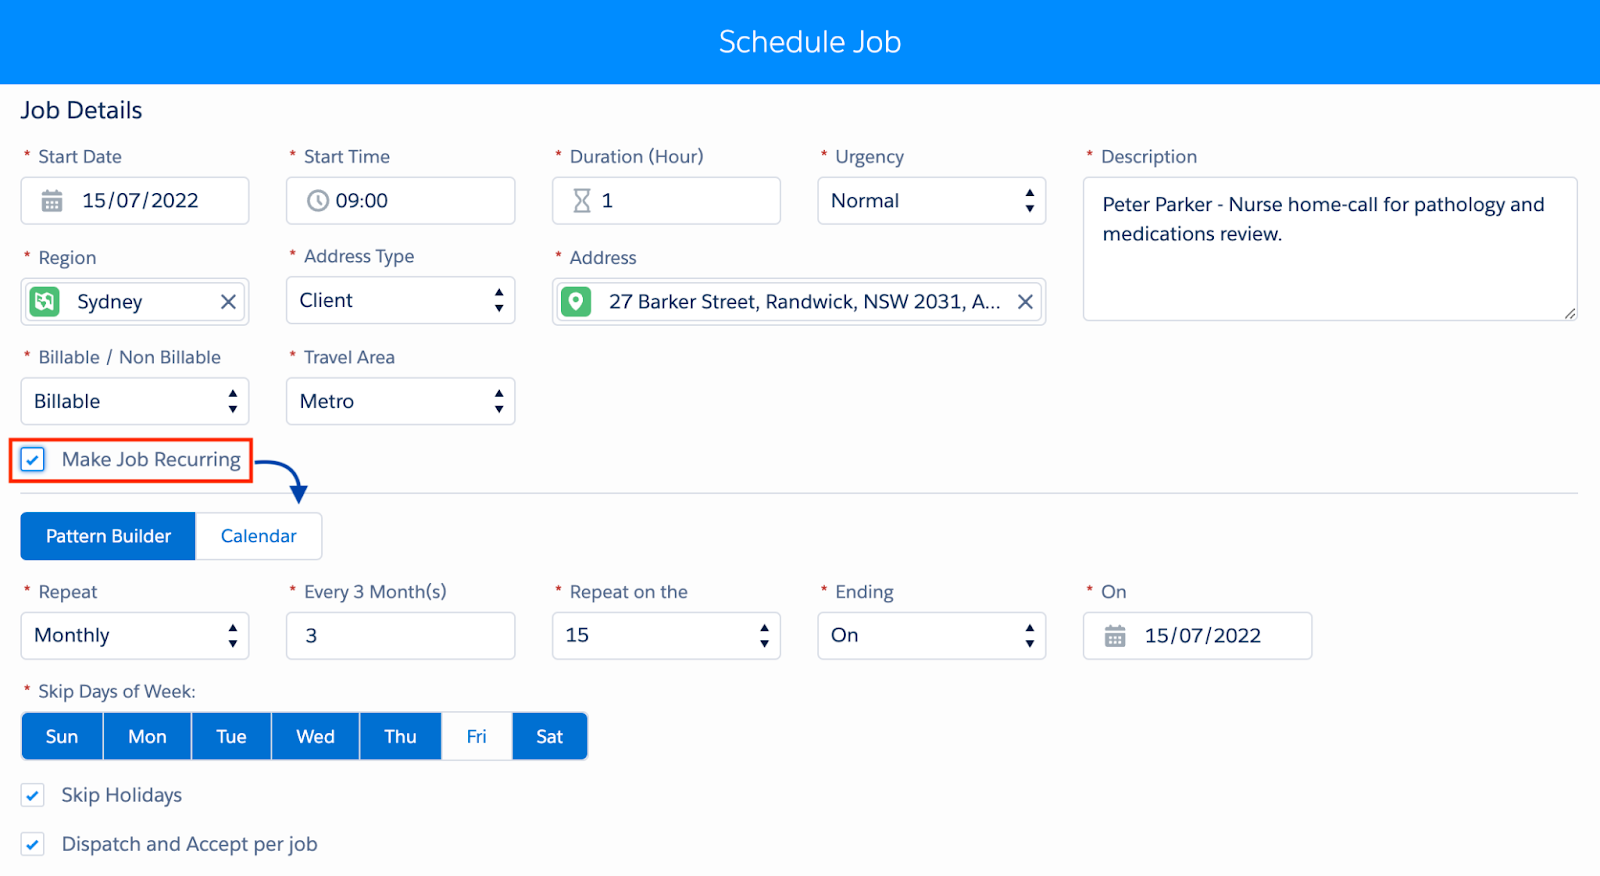
Key section that captures key information about the job. In this section you can also turn the job into a recurring schedule.
Additional fields
The Additional Fields section is for custom fields set up to collect additional information as per your organisation’s needs.

Service agreement details
This section is an unmanaged component and will need to be customised to enable the right information to be captured in order for the client to be billed. The data captured here will be used to create a Job Service Item record that is created for each entry.
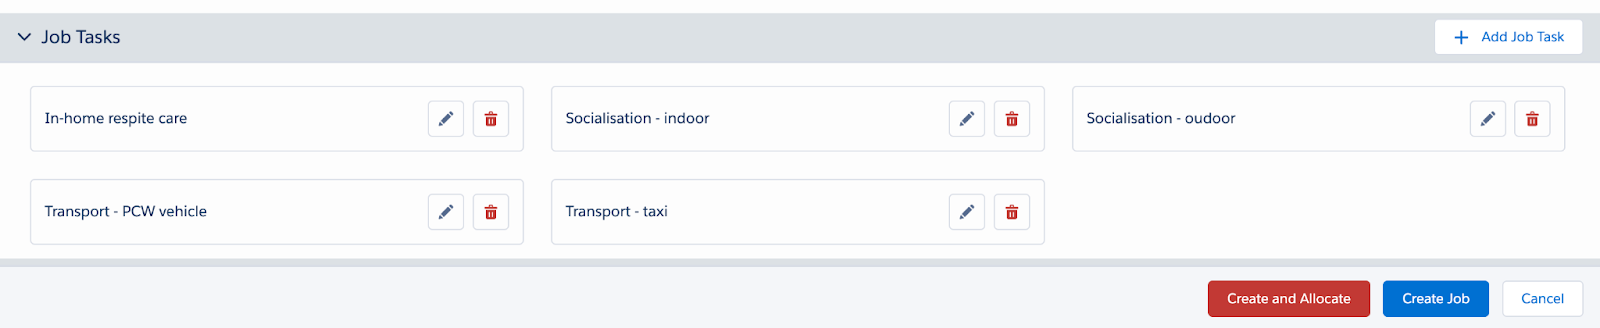
Job Tasks
Job Tasks are created from the corresponding Job Template that has been created for the selected Job Type. Existing Tasks can be modified or deleted and new tasks can be created
Resource requirements
Reflects requirements for the job for number of resources and the tags they need to be suggested for the work.

Fig: Schedule job, resourcing requirements
Create job or create and allocate
At the bottom of the model there are two different actions:
- Create job
- Create and allocate
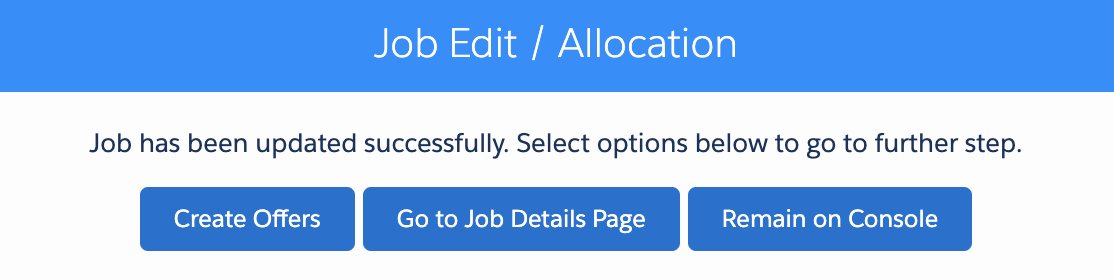
Create Job
Will save job and provide the following options
- Create Offers
- Go to Job Details Page will open the Job in the Skedulo Web App
- Remain on Console will navigate back to the Client’s record

Create and Allocate
Will open the Allocation screen created for this organisation where resources can be scheduled for the job. (See below for standard modal)
When the required resources are allocated, click Save & Dispatch, which will allocate and notify the resource.
A Job Edit / Allocation confirmation message displays. Click on Remain on Console to navigate back to the record that initiated the job creation process.