This article guides how to schedule jobs and allocate resources for group events. Refer to Allocate the Job in Single Client Bookings for more supporting information.
- Open the group event, and from the title bar, click Schedule Job.
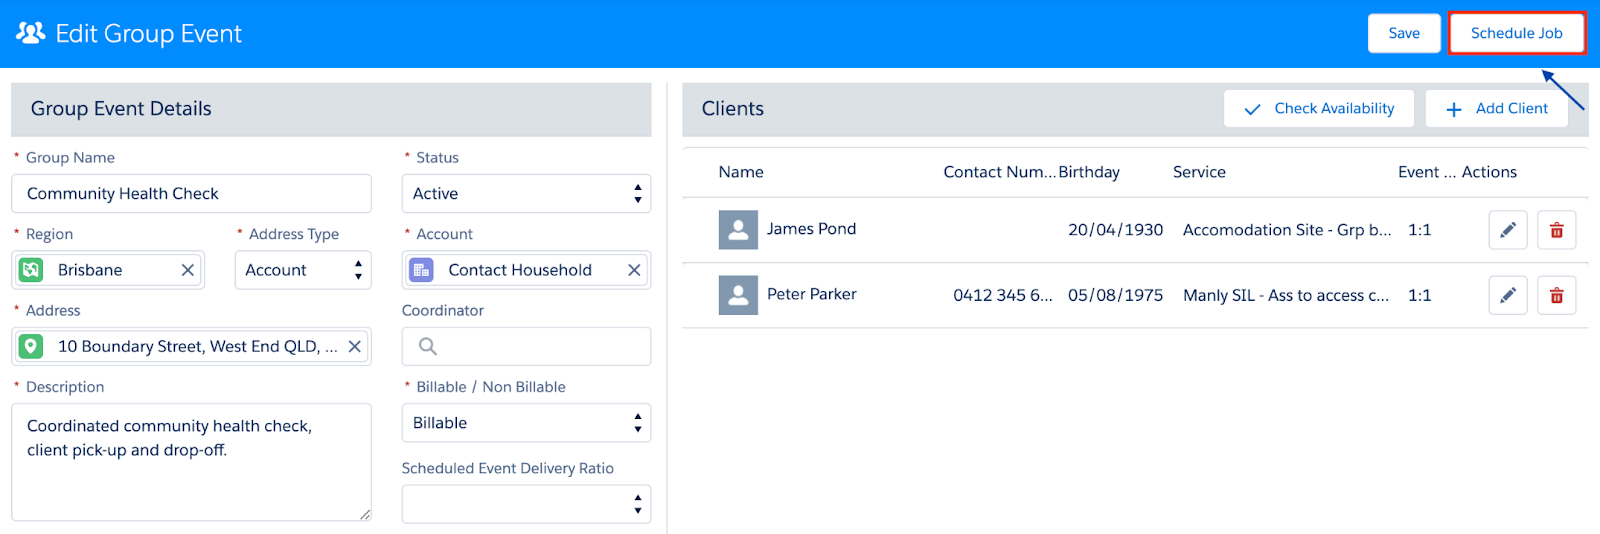
The Group Event – Schedule Job modal displays.
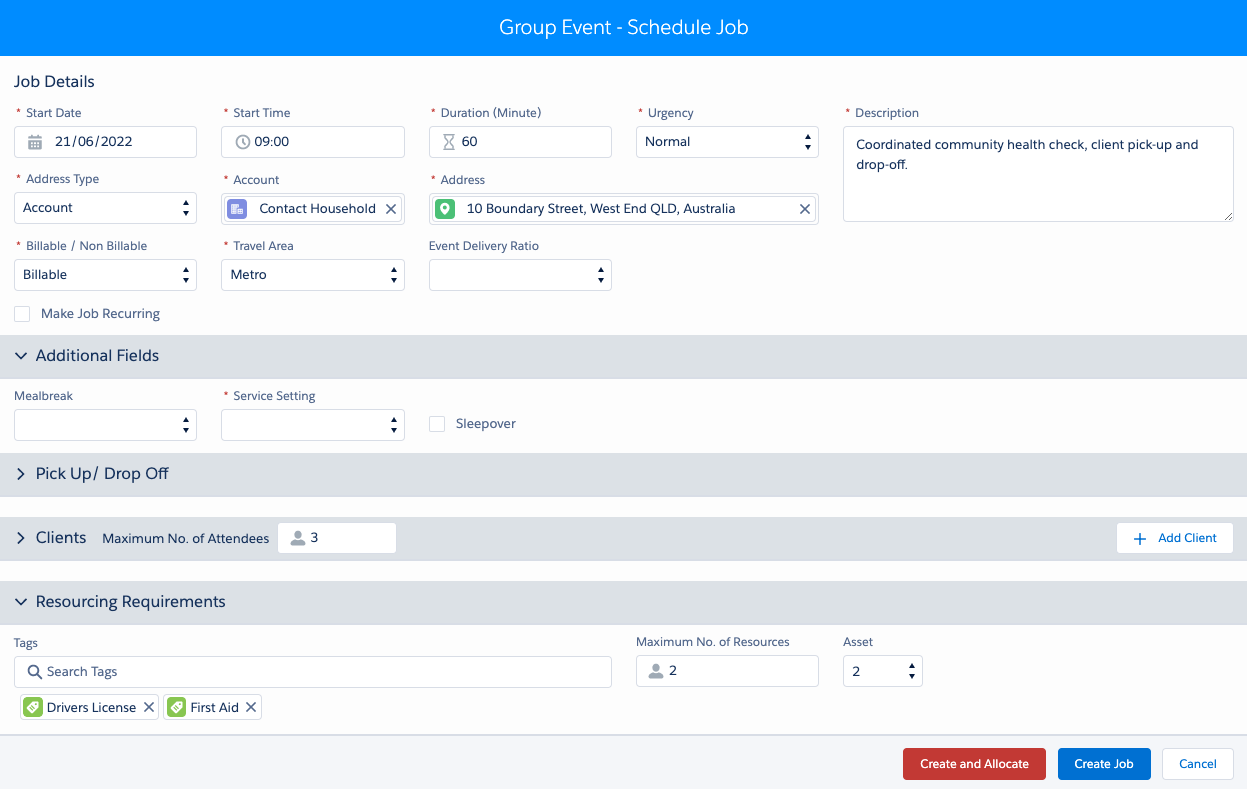
- Update the Job Details to reflect job being scheduled as needed, for example:
- Start Date – Date the job is expected to begin.
- Start Time – Time the job is expected to begin.
- Duration – Length of time the job is expected to run.
- Urgency – Urgency of the job, e.g., normal, urgent, or critical.
- Description – Information about the job to be carried out, including any additional details the worker needs to know.
- Address Type – Defines address type for job e.g., location, account, client, or address.
- Location – Adds an option to select a pre-configured location.
- Account – Adds an option to search for an account record
- Address – Will default to a location or account address if selected above. Or enter the address for the job if not pre-defined.
- Make Job Recurring – Opens the option Pattern Builder / Calendar where recurring job details are added. To learn more about recurring schedules, please refer to ‘Schedule job screen – Recurring schedule‘.
Note: For customers using our HCP solution, extra fields are shown, which are listed below
- Billable / Non Billable – Identifies if the service is to be billed for the job and if a service delivered record is to be created, or not billable.
- Travel Area – Defines the travel area to assist job planning, for example: Metro
- Regional
- Remote
- Very Remote
- Event Delivery Ratio – This is defined on the service agreement and controls apportionment value of the service. Refer to Lumary article https://support.lumary.com/hc/en-us/articles/900007684243-Apportion-group-services-through-the-service-delivery-entry-screen.
- Review and update the following sections as applicable:
- Additional Fields – Custom fields as defined by your organisation.
- Clients – Add or update client details as needed.
- Resourcing Requirements – Add or update tags, resources or assets.
- Pick Up/ Drop Off – Add client pick up / drop off details if required. (HCP Specific)
Note: For each client that is added, their times can be changed (with the scheduled time of the job) and this will be reflected in their service delivered record if the scheduled time is selected as the delivery method. In addition, if the number of clients is greater than the maximum number of attendees, a warning message will display.
Create job
When all the details have been entered correctly, you can create the job or create and allocate the job by clicking the buttons at the bottom.
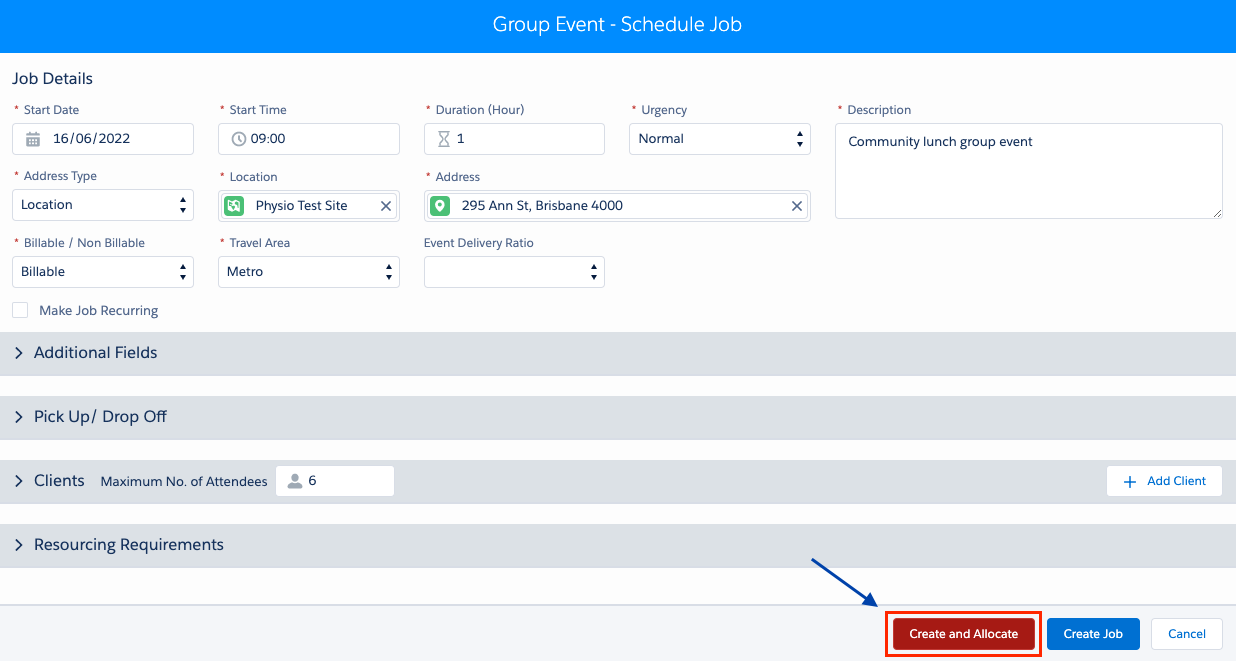
To learn how to allocate, you can view the guide ‘Allocate a job using the schedule job screen‘.