This article guides how to add client availability via the client availability console. Availability records are created to reflect a client’s availability or unavailability times for work scheduling. These records are used in the Client Availability check when creating a Job.
There are two ways to manage availability for clients within the client availability console;
- When viewing all clients inside the client availability console
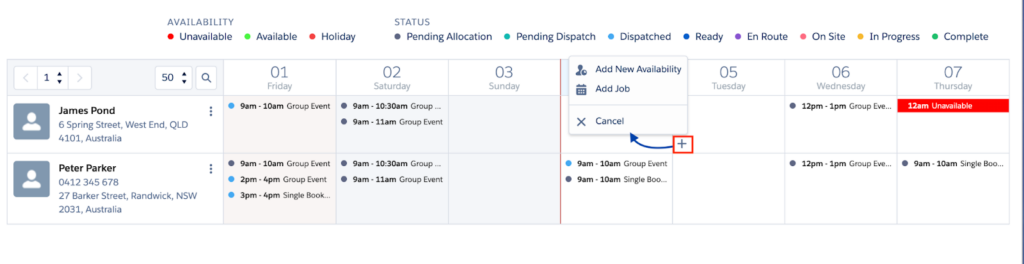
As you move the pointer over a calendar day, a plus (+) sign displays in the bottom left corner. This opens a menu to create a new client availability or create a new job.
2. By clicking the view period button next to a clients name in the client availability console

Clicking view period button against a client
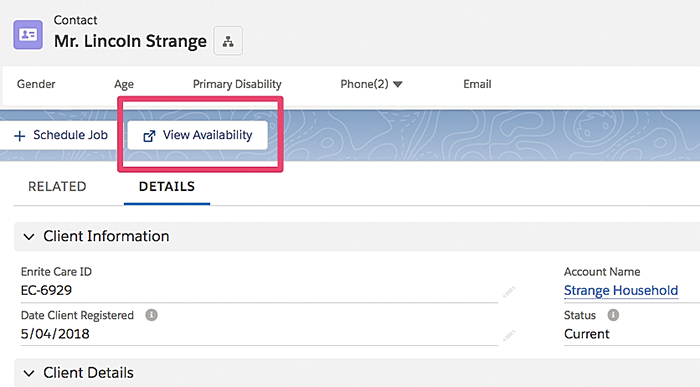
Note: The Individual Client view can also be accessed from the client's record in Salesforce using the View Availability button.
View Period opens an Individual Client calendar view, so that you can manage details for one client. You can create availability and jobs, hover to see details, and edit or delete records from this view, using the same actions for the main console All Clients view.

Create new client availability
Create a client availability record to reflect times they are available or unavailable for jobs to be scheduled.
Add availability in the client availability console
- While in the main client availability console screen, locate the client, position the pointer over the day and click the plus (+) sign. The menu options presented are ‘Add New Availability’ and ‘Add job’
- Click Add New Availability. The Create Client Availability modal displays.
Add availability when in the single client view
Availability can be created from the Individual Client view, using similar actions as used in the main console All Clients view. To create an availability from the Individual Client view:
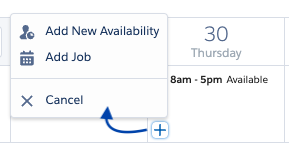
- Drag and drop or click on the day and time cell in the calendar. A context menu displays options.

- Click Add New Availability. The Create Client Availability modal displays.
Fill out the availability model
When you click the ‘Add New Availability‘ button the Create Client Availability modal displays.
Note: Client availability types need to be defined in Skedulo Shift Type Setting, type = clientAvailability
- Add the client’s availability information as follows:
- Availability Type – Select the record type to create:
- Available
- Holiday
- Unavailable
- Start Date and Start Time – Select the start date and time.
- End Date and End Time – Select the end date and time.
- Notes – Add extra information if applicable.
- Repeat – Tick the checkbox to add a recurring pattern. This can be created as a weekly or fortnightly pattern, recurring for a number of weeks, and can skip holidays.
- All Day – Will make the record a 24-hour duration for the dates selected.
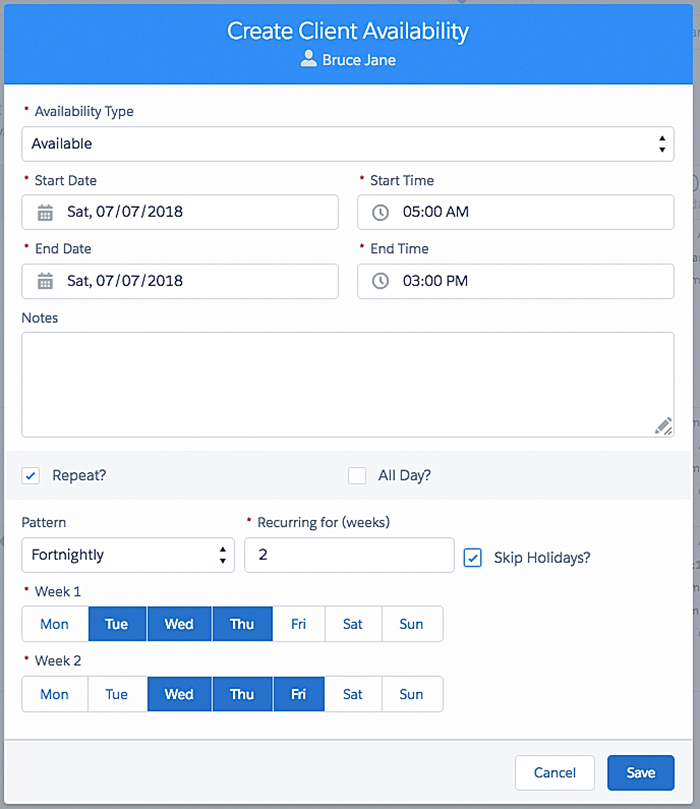
Click Save.
- An availability records check is done for the proposed dates/times. This will identify if there are existing records for the same time period.
- If there is any date/time clash, an Availability Conflicts modal displays, listing the records with a time period conflict.

Resolve availability conflicts using the following functions:
- Merge All – Merges the two records for each day into one record for the day, using the earliest start time and latest end times.
- Overwrite All – Replaces all existing records with the new records.
- Cancel All – Will not create any new records and keeps the existing records.
- Reset – Clears any entries made against the records listed.
- Save – Will save the record with conflicts still to be resolved.
- Cancel – Returns to the Create Client Availability modal, so that changes can be made.
Note: Merge, overwrite and cancel can also be selected at the individual record level. A value must be entered for each conflict to enable save.
- If no conflict is identified, the availability record is saved.
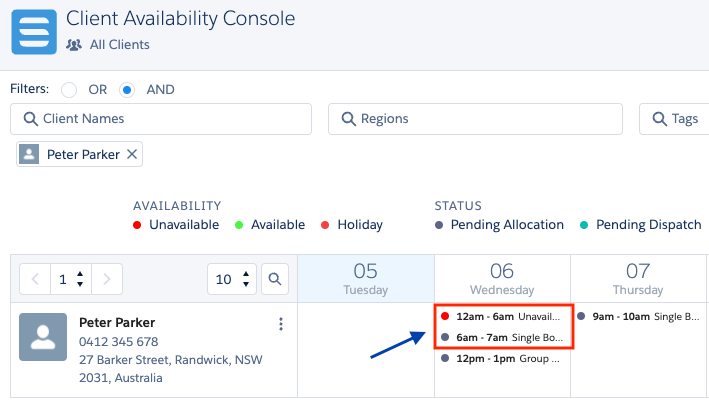
For example: If you created an unavailability for a specific time and day when viewing the individual clients period. The unavailability is added to the calendar for the client.
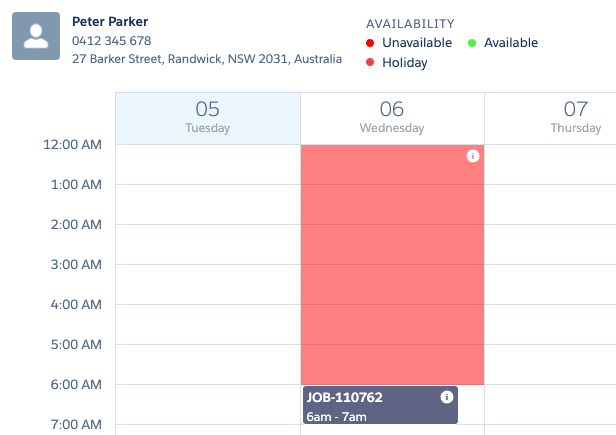
Returning to the All Clients view, the above examples display as follows.