The Attendees Form is designed for mobile workers who need to record client attendance for group event jobs. If you are running an event or service where multiple clients are scheduled to attend, this form provides a clear and simple way to:
- Add a common case note for all attended clients.
- See a list of all clients scheduled for the group event.
- Mark whether each client attended or did not attend.
- Record reasons for non-attendance.
Note: The setup, installation, and configuration of the Attendee Form is managed by your Skedulo support team. If you have any questions regarding its setup, please reach out to them.
How to Use the Attendees Form
The Attendees form is accessible directly from a Group Event job within the Skedulo Plus mobile app.
1. Viewing the List of Attendees
Once you open the Attendees form for a group event, you will see a list of all clients scheduled to attend.
- Information Displayed: For each client, the list typically shows:
- An avatar or photo (if available)
- Full Name
- Date of Birth
- Address
- Searching for Attendees: If the list is long, you can use the search bar at the top of the screen to quickly find a specific attendee by typing their name.

2. Viewing Attendee Details
To see more details for a specific attendee or to update their status, tap on their name in the list. This will take you to the Attendee Details screen.
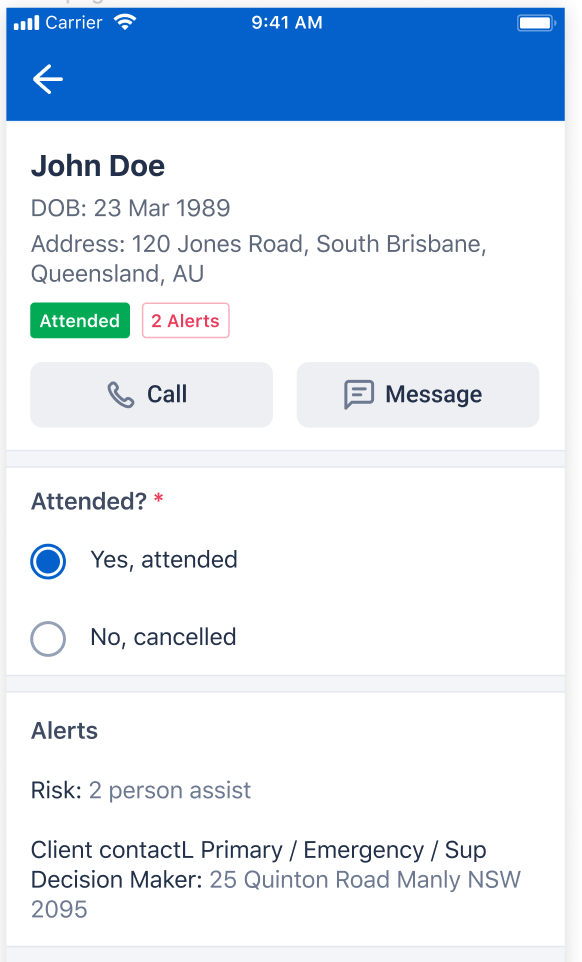
On this screen, you can:
- View Key Information: Such as Date of Birth and Address.
- Contact the Attendee: Buttons to directly “Call” or “Message” the attendee using their registered mobile phone number may be available.
- View Alerts: Important alerts related to the client are displayed (e.g., “Risk: 2 person assist”). The format is usually
<Alert Type>: <Details>.
Note: Attendee Alerts are not displayed on the Attendees form if your organization uses the ACD (Aged Care & Disability) package.
3. Marking Attendance
On the Attendee Details screen, you can update the attendance status for the client:
- Default Status: Clients are marked as “Yes, attended” by default.
- Changing Status:
- Select “Yes, attended” if the client is present.
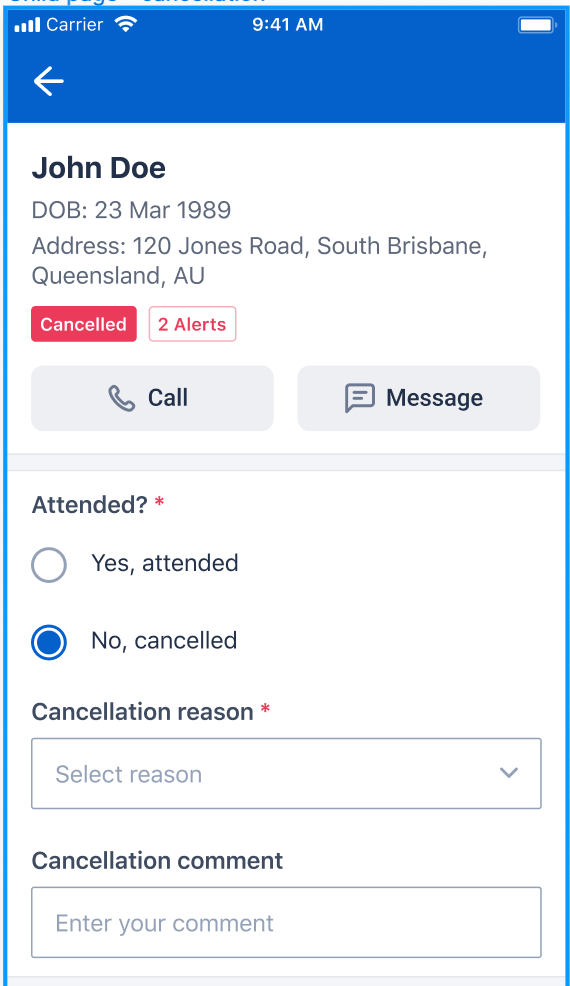
- Select “No, cancelled” if the client did not attend.
- If “No, cancelled” is selected:
- Cancellation Reason: You will be prompted to select a reason for the cancellation from a predefined list (this list is managed in Salesforce). This field is mandatory.
- Cancellation Comment: You can add further details or comments about the cancellation. This field supports long text and special characters.
When you save the form, these attendance details, including cancellation reasons and comments, are saved to Salesforce. The status on the main Attendees list in the app will also update (e.g., from “Attended” to “Cancelled”).
4. Adding a Group Case Note
Note: The Group Case Note functionality is not available on the Attendees form if your organization uses the ACD package.
If you need to add the same case note for all clients who attended the group event, you can use the “Add group case note” feature.

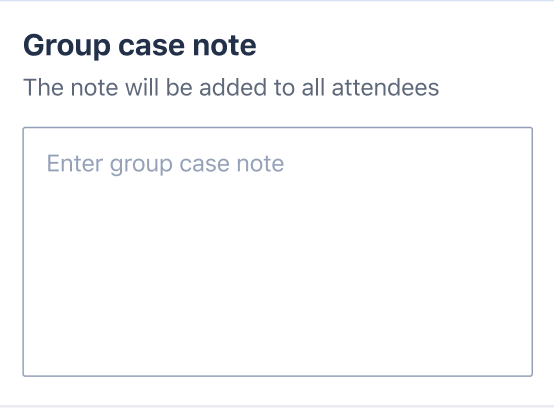
- How to Add:
- From the main Attendees list screen, tap the “Add group case note” button.
- A field will appear for you to type your note. This field supports long text and special characters.
- What Happens:
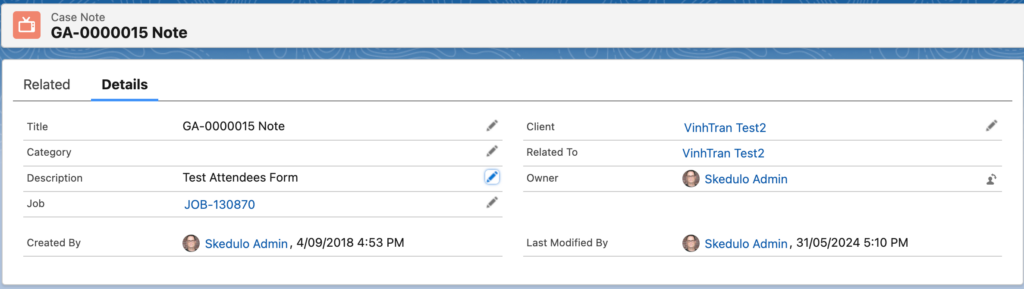
- When you save the main Attendees form, a new case note record with the content you entered is created in Salesforce for every client whose status is “Yes, attended”.
- The case note in Salesforce will typically have:
- Title:
<Group Attendee ID> Note - Description: The note content you entered.
- Job: Linked to the current Job ID.
- Client: Linked to the respective attendee.
- Title:
- If you repeat this process (e.g., add another group case note later and save), new case note records will be created. Existing ones are not overwritten.
5. Saving the Form
Once you have updated all necessary attendance statuses and added any group case notes, tap “Save” (usually found at the top right of the screen). All the information you’ve entered or changed will then be synchronized with Salesforce.