A single client record is accessed inside the Client Details form within the mobile app. This guide focuses on how to interact with individual records found within each section, such as Assessments, Case Notes, Goal Achievement Plans, etc. To learn how to access records within the client details mobile form, please refer to our user guide ‘Access client information using the client details mobile form‘.
Terminology Guide
| Name | Description |
|---|---|
| Object | Groups electronic health records based on their core purpose. For example, Case Notes, Assessments, Goal Achievement Plans, etc: |
| Record Type | Represents a collection of records for a type of electronic health record. For example the Case Notes object can have different types (Clinical, Activity, Goal Progress, etc:) |
| Record | The individual record for a given object and record type, that contains multiple fields. |
| Fields | Information and data stored in various field types such as text, textareas, checkboxes, select, multi-select, etc: |
Accessing Record Details
When users tap on any displayed objects, they are directed to a list that showcases records related to that object. These records:
- Are organised based on sort by conditions set by an organisation-wide configuration.
- Are linked to the client.
- Are filtered and limited according to filter conditions governed by an organisation-wide configuration.
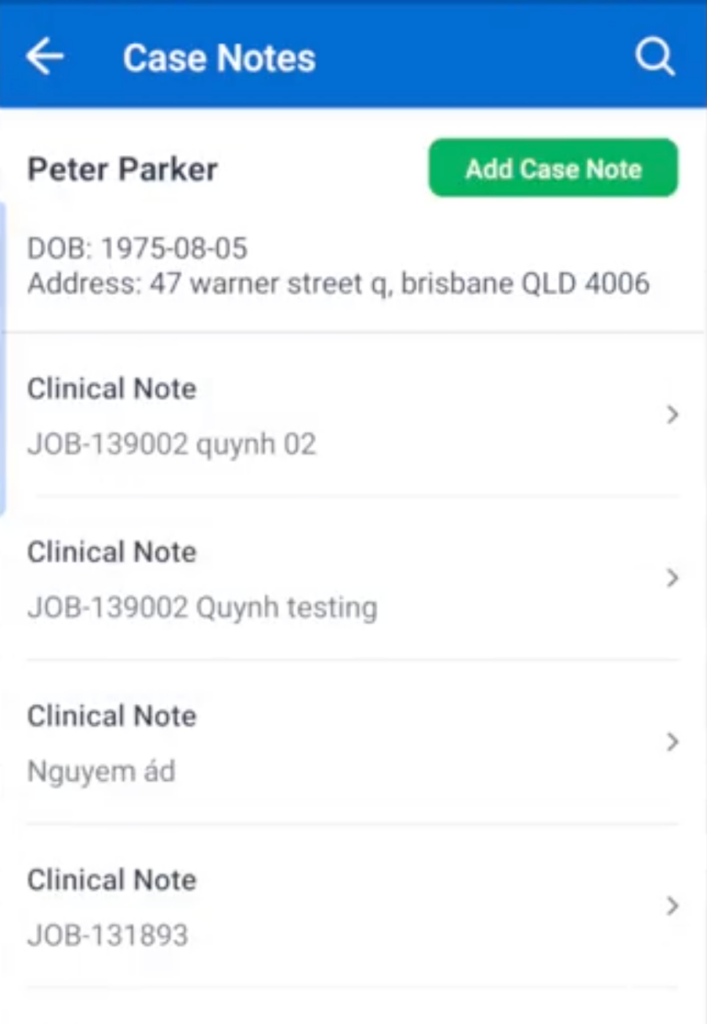
The fields shown on this page for each object are currently fixed. The Record Type and Name will be displayed.
Understanding the Information Displayed
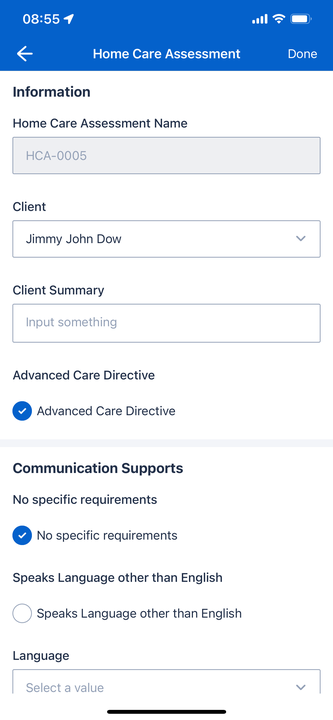
When clicking on a single record, you will be taken to the record detail page that outlines all the information for that particular client, object and the specific record you are viewing. The fields and information you see on the record detail page are determined by the type of record you are viewing, your organization’s setup and your user permissions. This means:
- You’ll only see fields you have permission to view.
- The order and grouping of fields are set by your administrators.
Editing Records
If you have the necessary permissions, you can edit the information in a record.
- You must have “edit object” permission to make and save changes.
- If you don’t have permission to edit a specific field, it will appear as read-only.
- Some fields might be marked as “required” by your organization and must be filled in.
When you have made all the necessary changes, click the Save button to sync your changes.
Adding New Records
If you have “Create Object” permission for a specific object type (e.g., Case Notes), you’ll see an “Add New” button (e.g., “Add Case Note”).
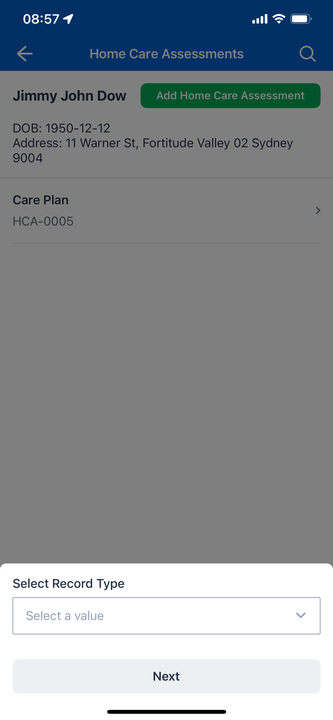
- Tap the “Add New” button.
- Select a Record Type: You may be prompted to choose a record type. The options available depend on your user profile and permissions. The record type determines the layout and fields for the new record.
- Fill in the Details: The form for the new record will open.
- Some information, like the Client’s Name and the Job Name (if applicable), may be automatically populated.
- Complete the necessary fields based on the page layout and your permissions.
- Save the Record.
Managing Attachments
For certain objects, your organization may enable an attachments feature. If enabled for an object record you are viewing:
- You can view existing attachments.
- You can add new attachments (e.g., photos, documents).
- You can delete attachments, if you have permission.
Note: To ensure good performance, there's a limit of five (5) files that can be attached per individual record.