A shift can be created only when resource and location are selected and the view is set to Shift. A region and location can be added to the shift automatically if selected in the filters.
To create a new shift from the console:
- Select the Resource and set the View to Shift. The Region and/or Location can also be selected.
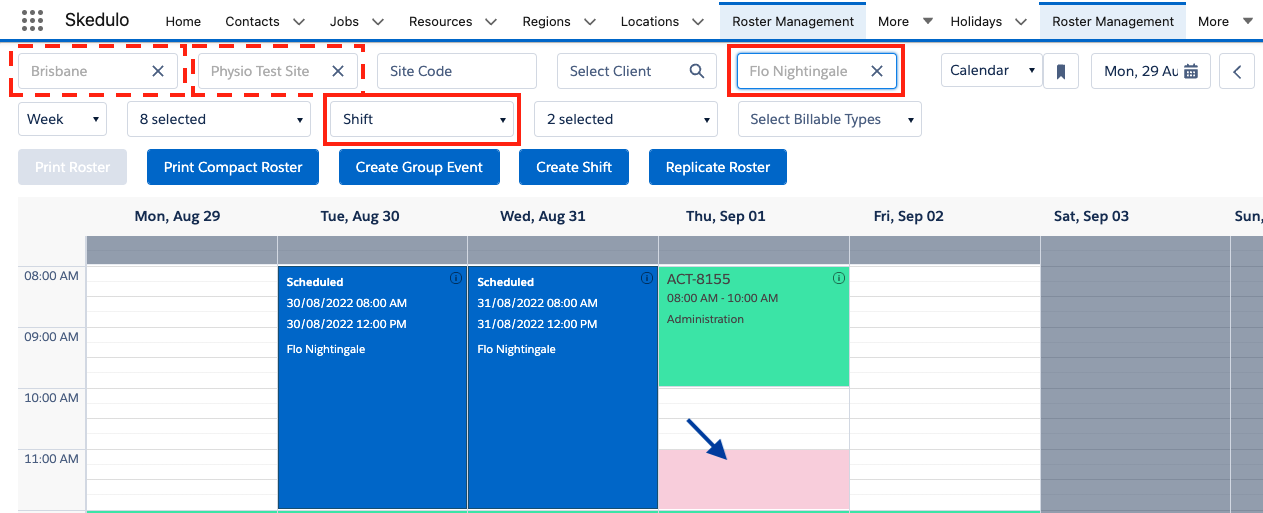
The calendar displays and will show scheduled shifts and activities.
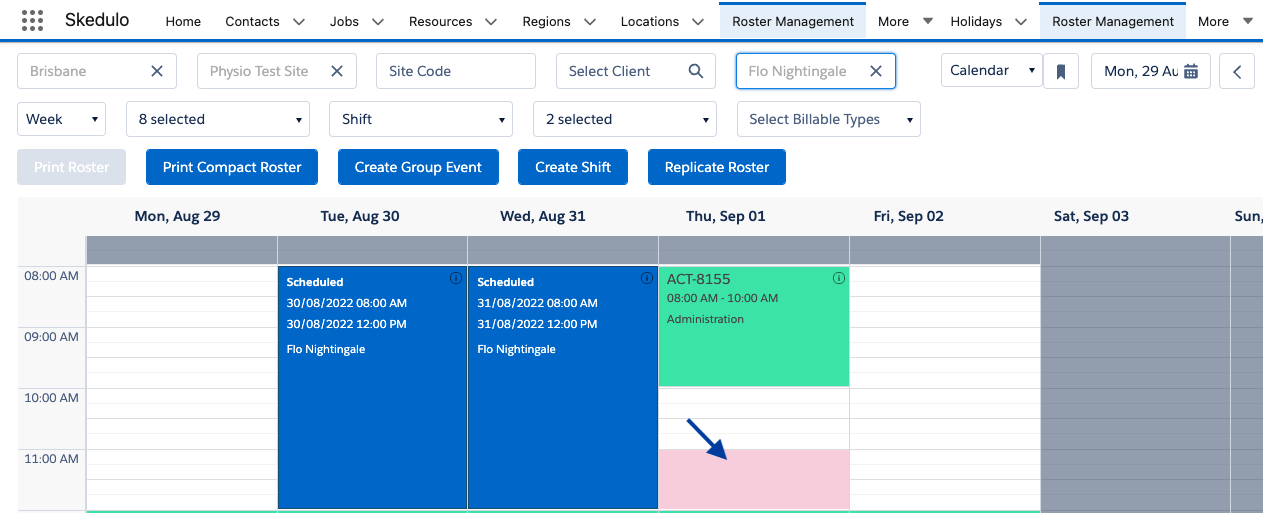
- Click on an available calendar time or click and drag to select a time frame.
The Create Shift for Resource Name modal displays.
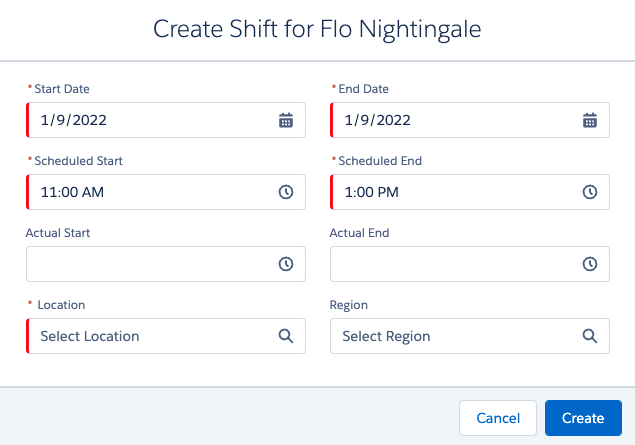
Note: The Require_Shift_Location setting will determine if Location is mandatory.
Note: Additional fields can be added to the Shift Modal
- Click Create to add the shift for the resource.
The new shift is added to the calendar.
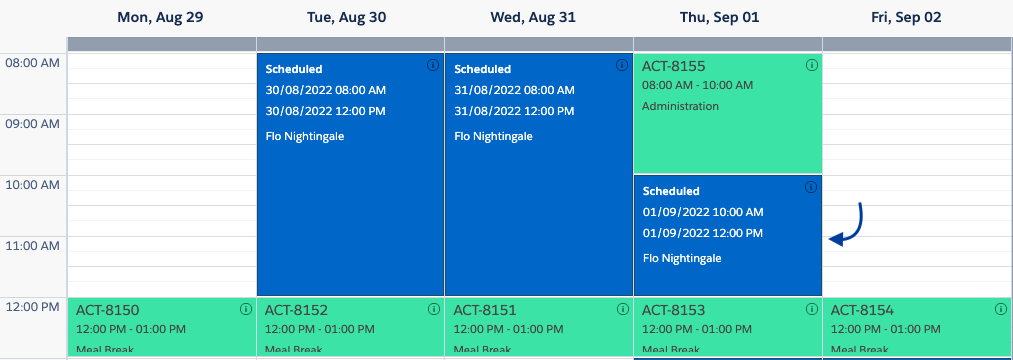
Note: A check is performed when the shift is created to ensure there are no overlapping shifts for a resource. A warning indicator is displayed when creating a new shift and the new shift conflicts with another shift, a resource's unavailability or a job.
A warning indicator is displayed when creating a new shift and the new shift conflicts with another shift, a resource’s unavailability or a job.
All other functions found in the Roster Management Console are listed in the user guide ‘Roster Management Console functions‘.