This article guides how to clients to a group event and add event details. To learn more about group events and bookings, please check out;
Adding clients
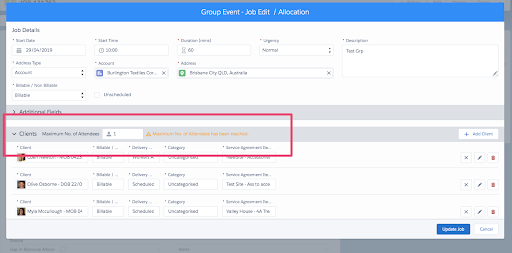
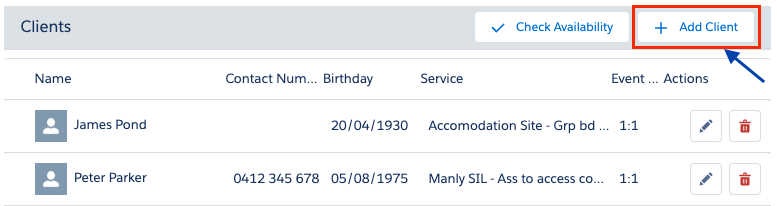
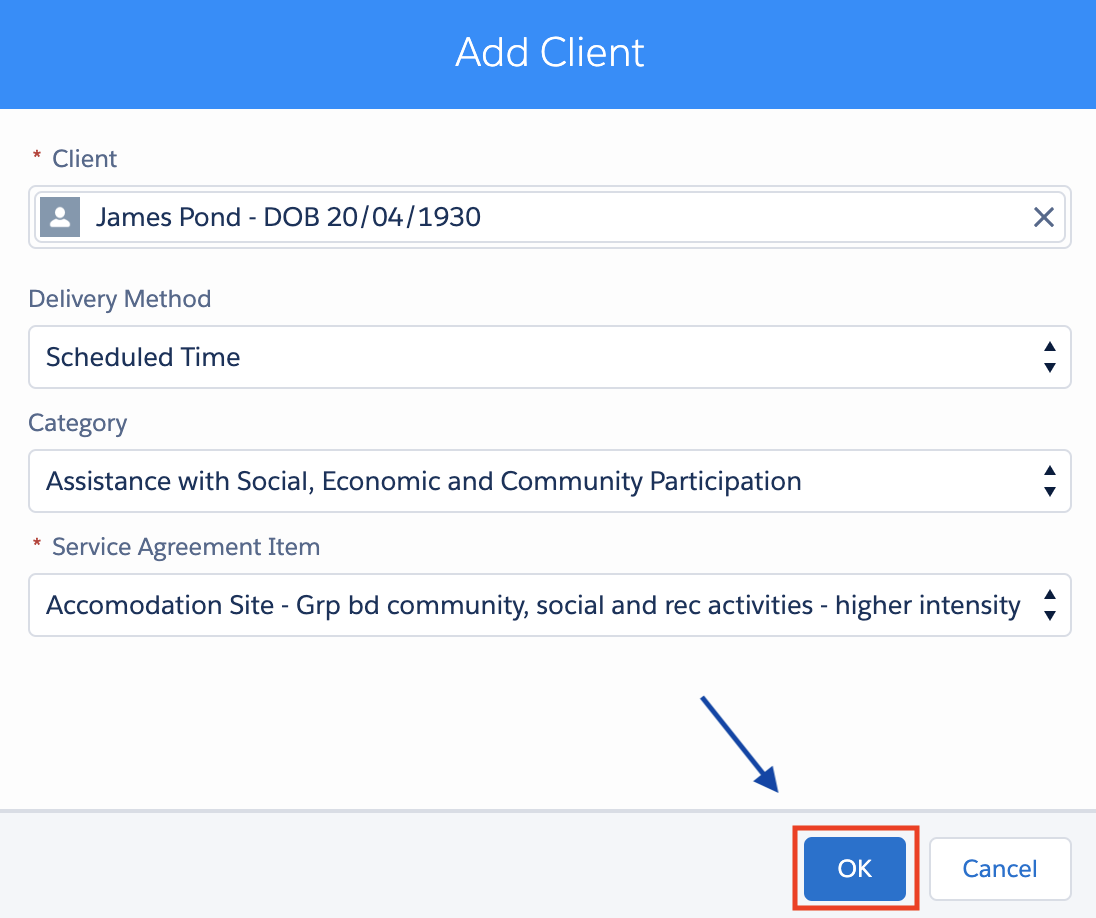
Add the Clients who will be attending, click + Add Client and update as follows.
The Add Client modal displays. As information is added, more fields will display.
- Client – Search for the client by starting to type their name. Click on the client’s name when the correct name shows in the list.
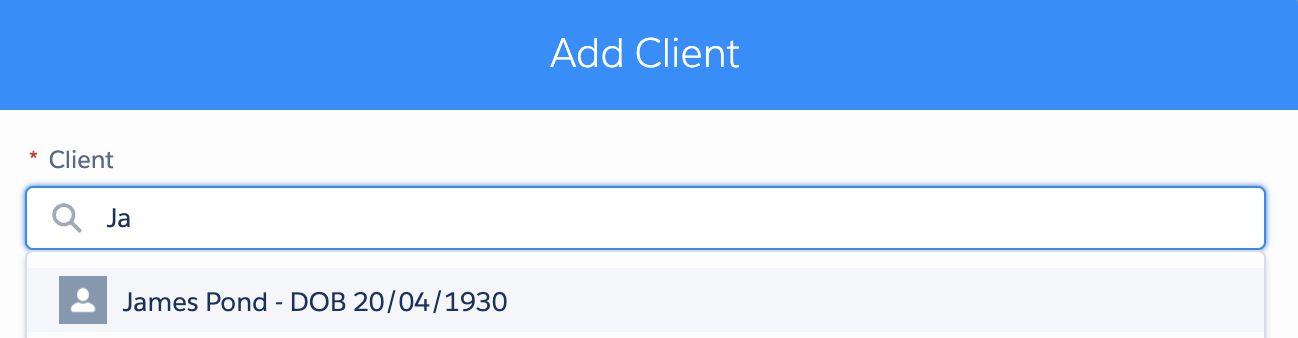
- Only clients with a current service agreement will display.
- Setting Require_Clients_On_Group_Booking will determine if you require clients to be added to a group event.
- Setting Require_Job_Billing_Info will determine if service details are necessary
- Delivery Method – Select an item from list, for example:
- Workers Actual Time
- Scheduled Time
- Fixed Quantity
Note: At this point Skedulo runs a check with Lumary to determine what Service Agreements are available for the client
- Category – select a category from the dropdown list. This displays current categories that are related to service agreements for the client.
- Service Agreement Item – display after a category is selected. Select the applicable item from the list.
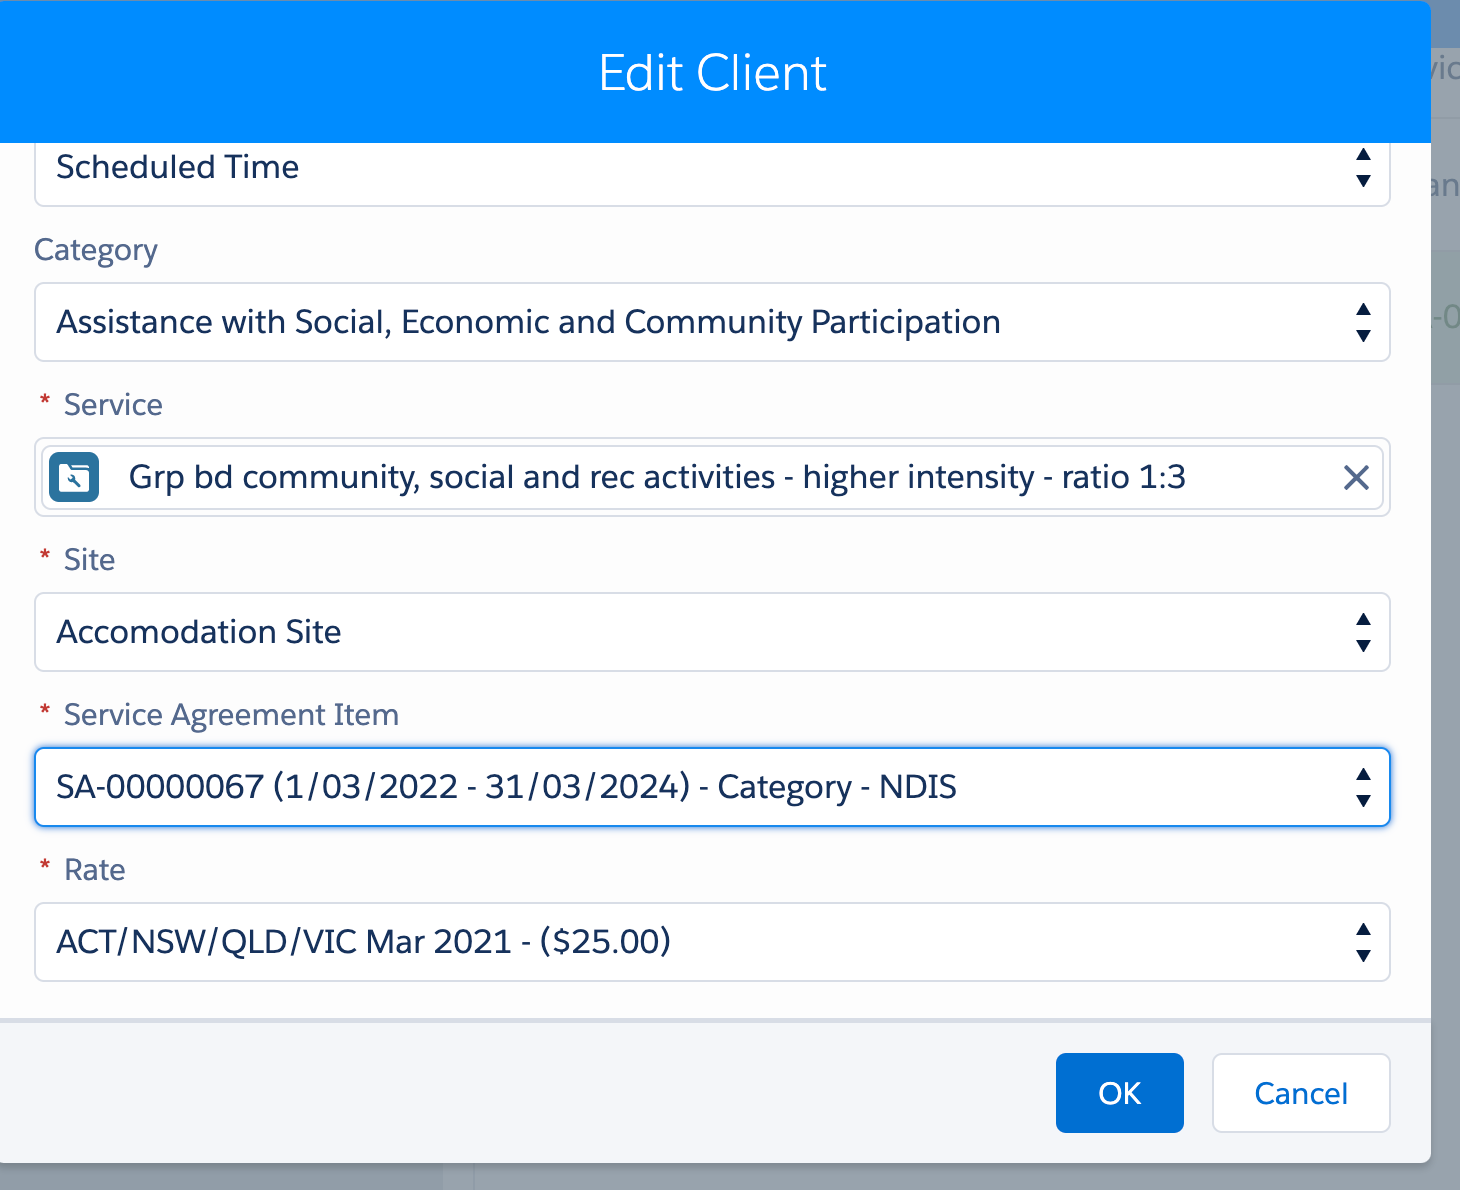
Note: In some instances the Site and Rate will need to be selected, as per Service Agreement conditions.
- Event Delivery Ratio – This value is pulled from the Line item in the service agreement and determines how much the rate will be apportioned on the Service Delivered Record.
- Travel Chargeable? – Tick for the client for whom travel will be charged.
Note: A billing record is created for each service item when ticked. Refer to your organisation’s guidance on scenarios for which you will apply travel charges.
Clicking on OK to confirm adding a client to the event then a Confirm pop-up will appear with two options:
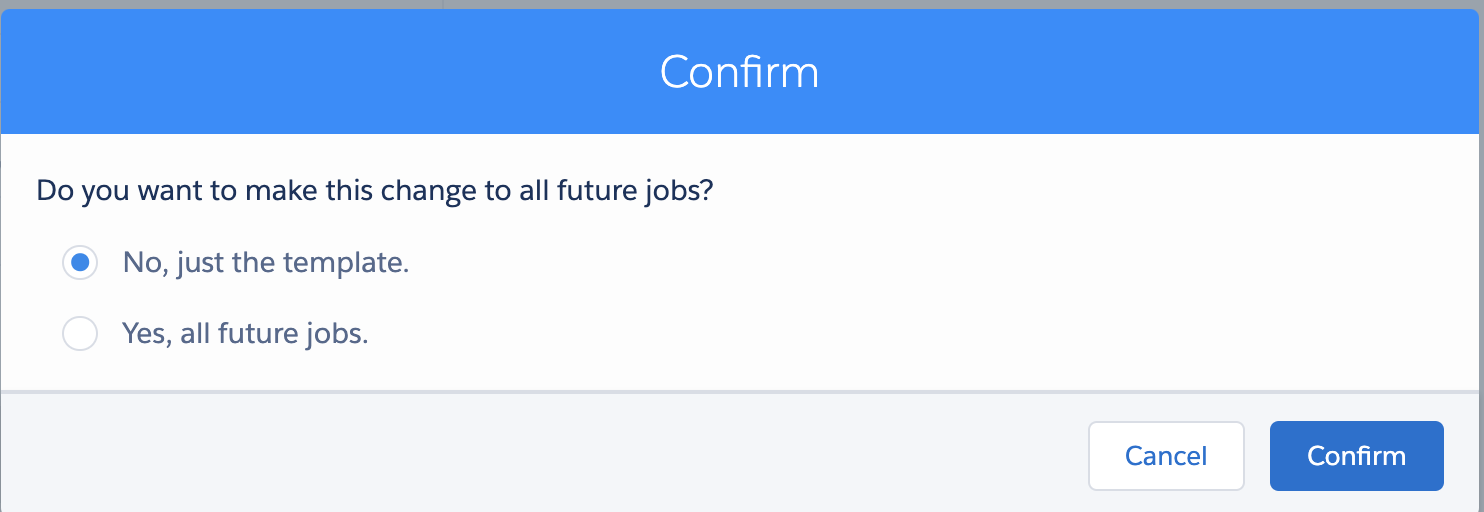
On the pop-up modal, User has two selections:
- No, just the template – selected by default to only add a client record to the Group Event Template.
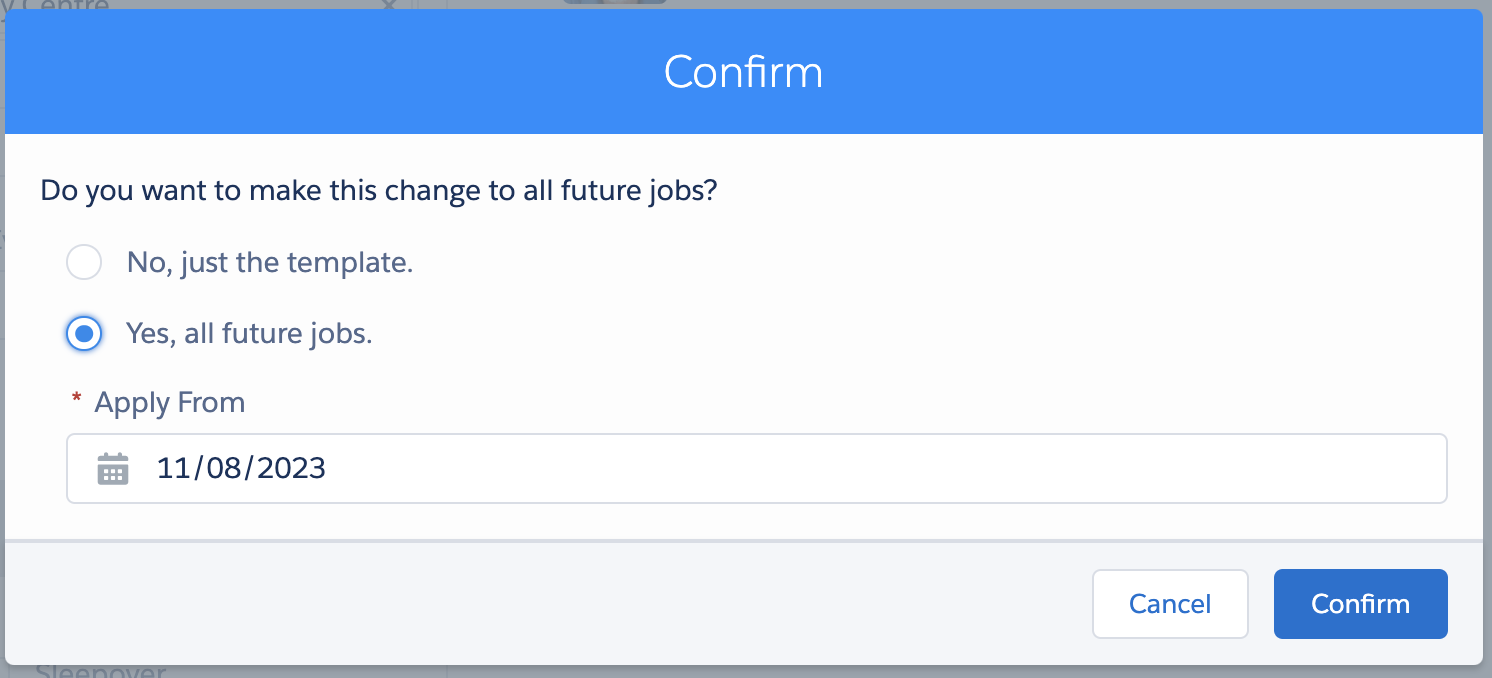
- Yes, all future jobs – opens a date picker named “Apply From” (default value is Today and unable to select a date in the past) for users to specify from which date a client record will be added into future jobs.
- When today’s date is selected, (Jobs’ start date = date selected and start times >= current time) or (Jobs’ start date > date selected) will be affected.
- When future date is selected, Jobs’ start date >= date selected will be affected
Then click on the Confirm button.
- To edit client details, click on the button with a pen icon.

The Edit Client modal displays.

Click OK to confirm editing the client to the event, then a pop up will appear
On the pop-up modal, User has two selections:
- No, just the template – selected by default to only update a client record to the Group Event Template.
- Yes, all future jobs – opens a date picker named “Apply From” (default value is Today and unable to select a date in the past) for users to specify from which date a client record will be updated into future jobs.
- When today’s date is selected, (Jobs’ start date = date selected and start times >= current time) or (Jobs’ start date > date selected) will be affected.
- When future date is selected, Jobs’ start date >= date selected will be affected
Then click on the Confirm button.
- Remove the client, Click on the remove icon next to the client details

A confirmation message displays.

Clicks Ok to confirm, then a pop-up will appear

On the pop-up modal, User has two selections:
- No, just the template – selected by default to only remove a client record to the Group Event Template.
- Yes, all future jobs – opens a date picker named “Apply From” (default value is Today and unable to select a date in the past) for users to specify from which date a client record will be removed into future jobs.
- When today’s date is selected, (Jobs’ start date = date selected and start times >= current time) or (Jobs’ start date > date selected) will be affected.
- When future date is selected, Jobs’ start date >= date selected will be affected
Then click on the Confirm button and then click Save.

Repeat the + Add Client steps above to add more attendees if applicable.
Multiple Client Records
Clients added to the group event will be added automatically to jobs created for the event.
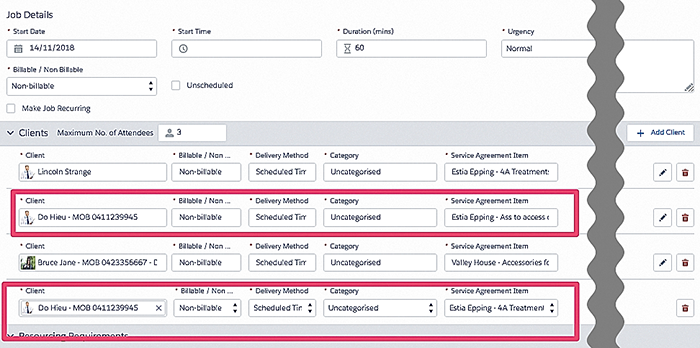
Note: When adding a client to a group event or job, the same client can be added more than once, using a different service agreement item or combination. For each record on a job, a separate Job Service Item is created which can then be used for billing when the job is closed.
If the maximum number of attendees is exceeded a warning message displays.