This guide will help you understand and use the Client Contacts form within the Skedulo mobile app. This form is designed to give you quick access to essential contact information for people associated with your clients, enabling you to communicate effectively when needed.
Note: The setup, installation, and configuration of the Client Contacts form is managed by your Skedulo support team. If you have any questions regarding its setup, please reach out to them.
What is the Client Contacts Form?
The Client Contacts form allows you to easily view a list of important contacts related to a client directly within a job’s details in your Skedulo mobile app. You can see their relationship to the client (e.g., Primary Contact, Emergency Contact) and, in most cases, call or text them with a single tap. This ensures you have the necessary information at your fingertips when you’re out in the field.
Why Use Client Contacts?
This feature is particularly useful in scenarios where you need to:
- Contact a client’s primary caregiver for an update.
- Reach an emergency contact quickly.
- Speak to the next of kin regarding scheduling or care.
- Get in touch with a billing contact for administrative queries.
- Communicate with any other designated support person for your client.
Accessing Client Contacts in the Skedulo Mobile App
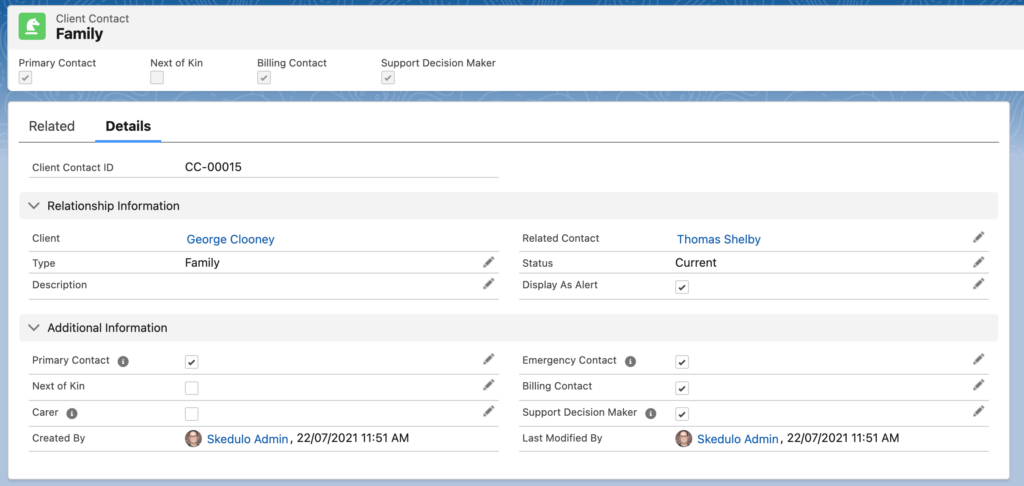
The client contacts are records related to the client record inside of Salesforce, which are pulled into the Skedulo mobile app using the client contacts mobile form.
You can access the Client Contacts feature from both single client jobs and group event jobs.
1. For Single Client Jobs:
- Navigate to the specific job for the client.
- Within the job details, you will find an option or section to view Client Contacts.
2. For Group Event Jobs (Skedulo Plus):
- Open the group event job.
- You’ll typically see a list of clients attending the event.
- Select the specific client whose contacts you wish to view. This will then display their associated contacts.

Navigating the Client Contacts List
Once you access the feature for a selected client:
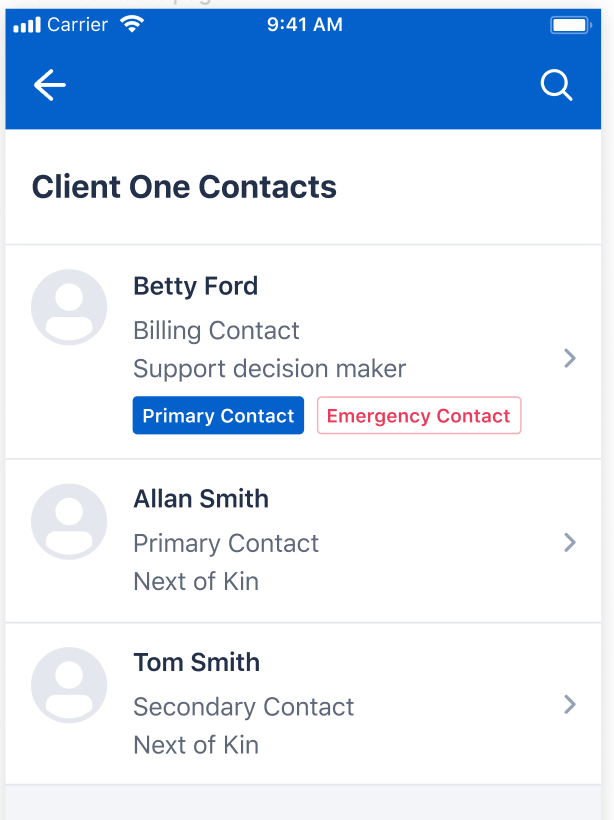
- View the List: You’ll see a list of individuals associated with that client.
- “Current” Contacts Only: The list displays only contacts whose status is marked as “Current” in the system. This ensures you’re seeing the most relevant and up-to-date contacts. If a contact is expected but not visible, their status may not be “Current.”
- Search for a Contact: If the list is long, you can use the search bar (usually at the top) to find a specific contact by typing their name.
Viewing Contact Details and Taking Action
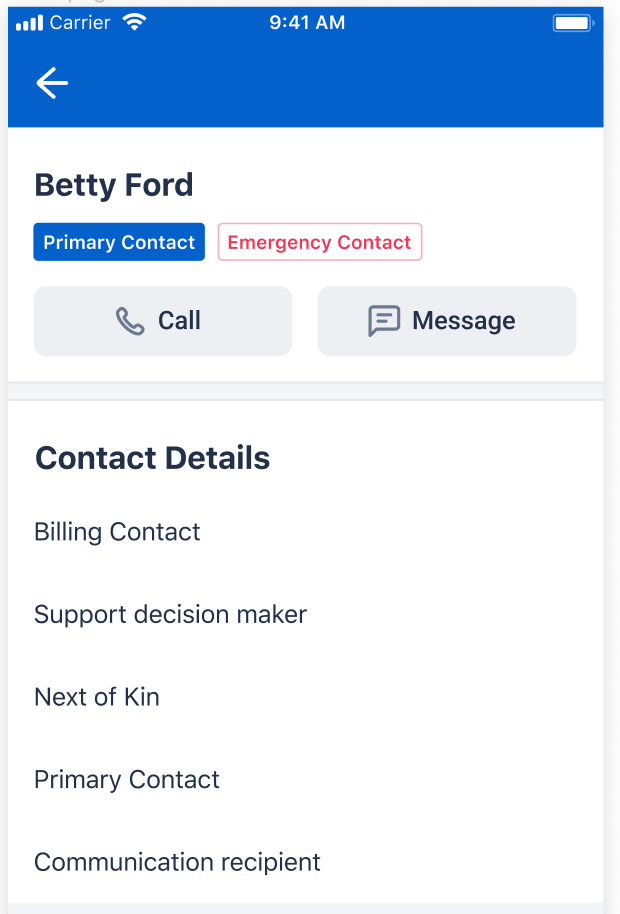
When you select a specific contact from the list, you’ll be taken to their details page. Here you can:
- View Information: See the contact’s full name, and if available, their photo/avatar.
- Make Calls or Send Texts: Buttons to directly Call or Message (Text) the contact via their registered mobile phone number will typically be available. Tapping these buttons will initiate the call or open your device’s messaging app.
Understanding Contact Tags
Contact Tags are special labels that identify the contact’s relationship or role concerning the client. These tags help you quickly understand why a particular person is listed as a contact.
- Highlighted Tags: On the main contact list, key tags such as “Primary Contact” and “Emergency Contact” are often highlighted for easy identification.
- Viewing All Tags: To see all tags associated with a contact, navigate to their individual contact details page.
Common Contact Tags you might see include:
- Substitute Decision Maker
- Support Decision Maker
- Next of Kin
- Guardian
- Primary Contact
- Billing Contact
- Emergency Contact
- Carer
- Carer for more than one person
- Co-resident
- Receive Client Mail
- Receive Carer Allowance
- Communication Recipient